Create a Website With Hostinge
If you’re ready to create a website with Hostinger, you’re about to embark on an exciting journey! Hostinger makes it easy to set up a site, but there are a few things you’ll need to have in place to get started smoothly.
In this guide, I’ll walk you through each step to create a website with Hostinger—from setting up hosting to launching your website. By the end, you’ll have the knowledge and tools needed to get your site live and ready to attract visitors. Let’s dive in!
Table of Contents
Step#1. Sign Up for Hostinger
To sign up for Hostinger, begin by heading to Hostinger’s official website. The homepage showcases various hosting options, from shared hosting plans to VPS and cloud hosting. Hostinger offers a range of plans designed to meet different needs, so whether you’re starting a personal blog or launching an e-commerce site, you’re covered.
Step#2. Choose a Hosting Plan
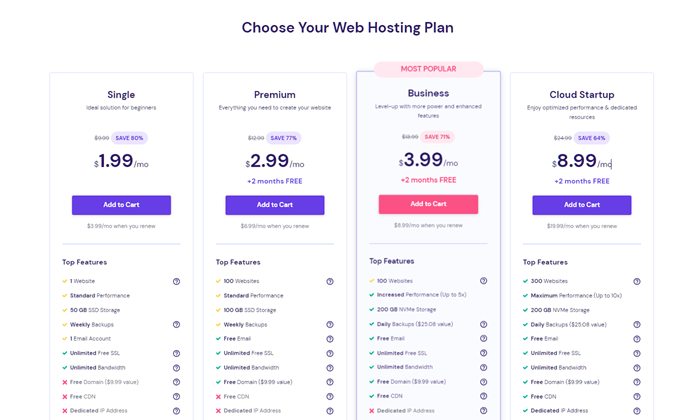
Hostinger provides several hosting plans that vary based on features and pricing. Here’s a quick breakdown of the options:
- Single Web Hosting: Ideal for beginners and those with a single website. This plan includes one website, one email account, and a free SSL certificate.
- Premium Shared Hosting: Perfect for small businesses or users with multiple websites. It includes unlimited bandwidth, up to 100 websites, and a free domain for the first year.
- Business Shared Hosting: Great for businesses that need more power and resources, this plan includes daily backups, more processing power, and optimized performance for larger sites.
Each plan offers unique benefits, so choose the one that best aligns with your website’s goals. Once you find the plan that fits your needs, click the Add to Cart button.
Step#3. Select Your Hosting Duration
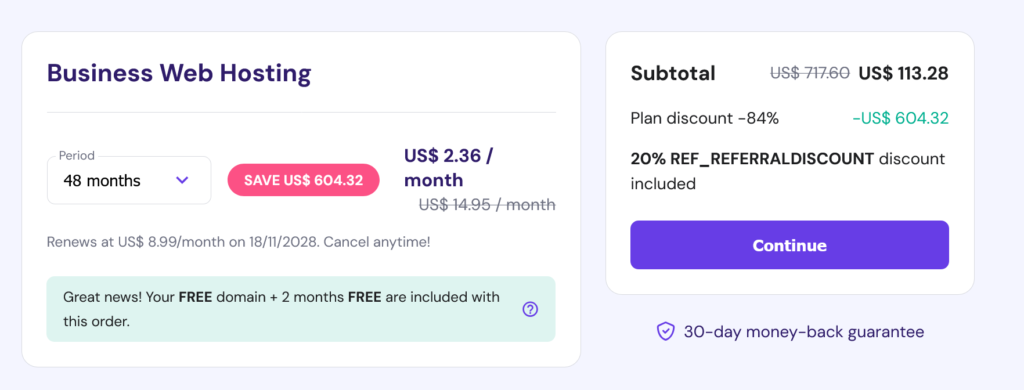
Hostinger provides options for 1-month, 12-month, 24-month, and 48-month billing cycles. The longer the plan, the better the discount you’ll receive. If you’re looking to save on hosting costs, selecting a longer plan is often the best option.
After choosing your preferred duration, Hostinger will display the total cost for the term selected, so you know exactly what to expect.
Step#4. Create Your Hostinger Account
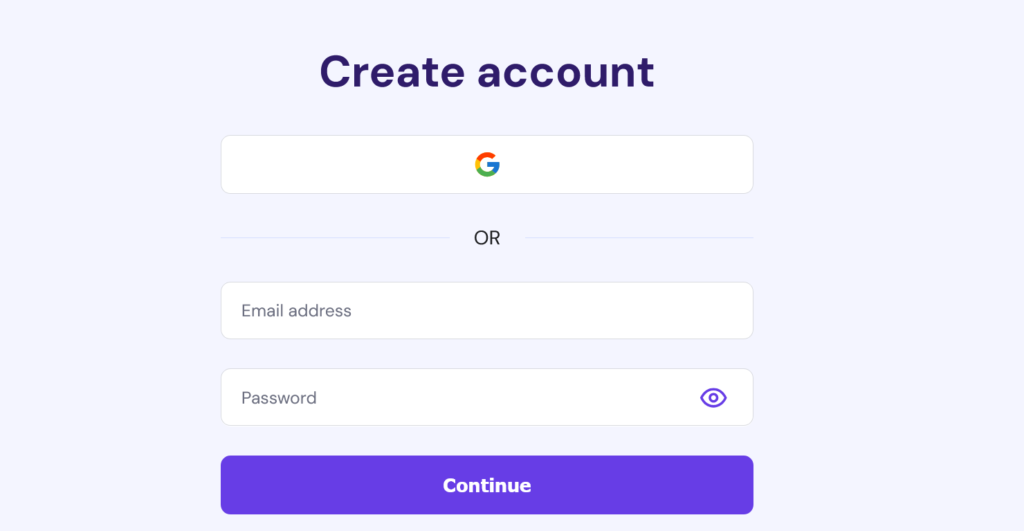
Now it’s time to set up your account. Hostinger offers several ways to sign up:
- Email: Enter your email address and create a password to register.
- Social Media: You can sign up using your existing Google or Facebook account for a faster setup.
Make sure your password is secure and unique to keep your account safe. Once your account is created, you’re ready to proceed to checkout.
Step#5. Complete Your Payment
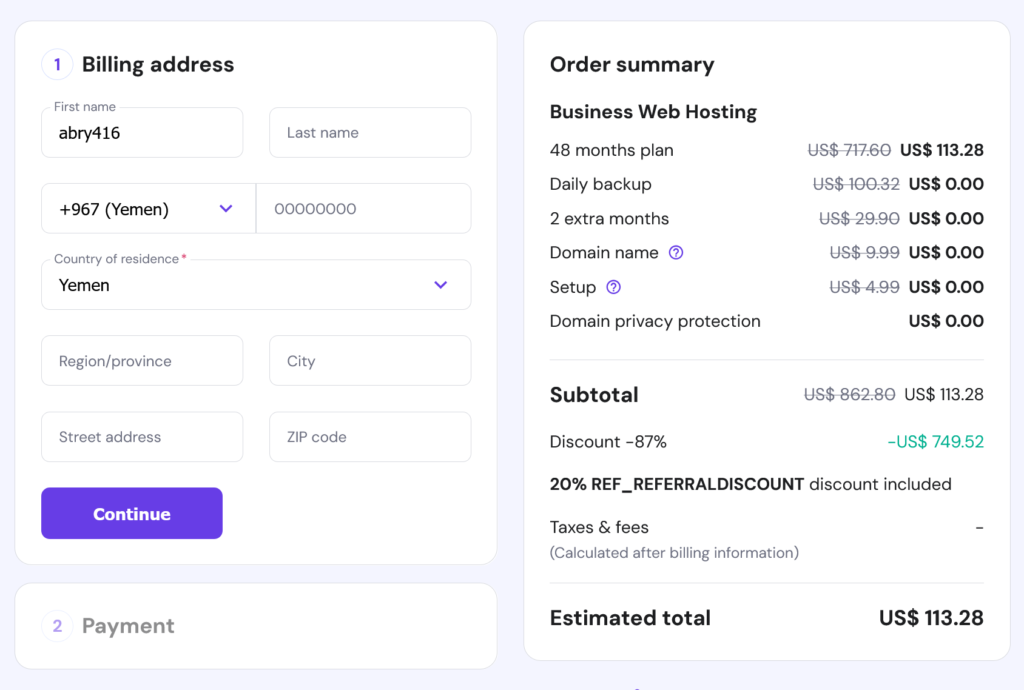
Hostinger supports a variety of payment methods, so you can choose the option that works best for you. Available methods typically include:
- Credit/Debit Card: Visa, MasterCard, Discover, and American Express are all accepted.
- PayPal: For those who prefer PayPal’s secure payment system.
- Cryptocurrency: For added privacy, Hostinger accepts Bitcoin and other cryptocurrencies.
- Google Pay and Apple Pay: Depending on your region, these may also be available.
After selecting your preferred payment method, complete the purchase. Hostinger will send you a confirmation email with your order details, and you’re all set.
Step#6. Set Up Your Domain Name
Some Hostinger plans include a free domain name for the first year, which is a fantastic perk. If you’ve selected one of these plans, here’s how to claim your free domain:
- Once your payment is complete, go to Domain Registration in your Hostinger dashboard.
- Enter your desired domain name and check its availability.
- Register the domain directly through Hostinger, making it easier to manage everything in one place.
If your chosen domain isn’t available, try slight variations until you find one that suits your brand.
Step#7. Access Your Hostinger Dashboard
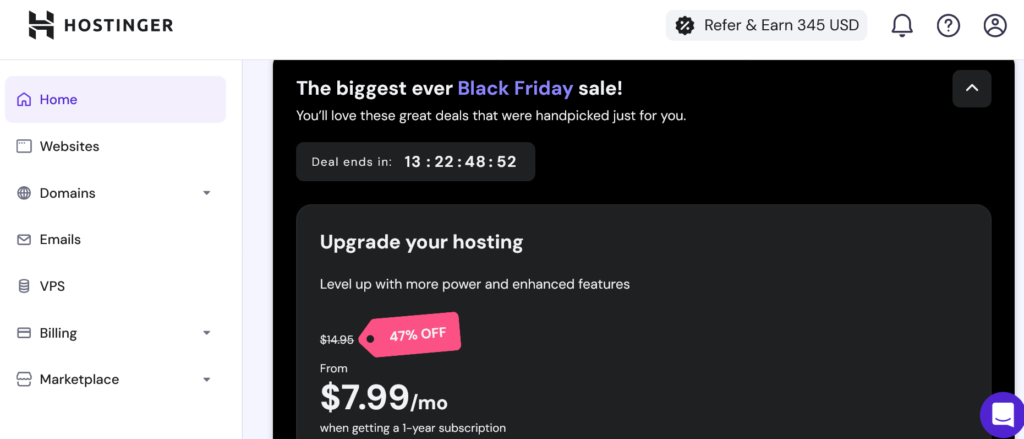
With your account set up and domain registered, you can now access the Hostinger dashboard. Here, you’ll find all the tools and features you need to set up and manage your website:
- Hosting Control Panel: Manage your server settings, email accounts, and databases.
- Website Builder: Hostinger’s drag-and-drop builder makes it easy to design a website without coding.
- One-Click WordPress Installer: Install WordPress or other CMS platforms with a single click, saving time and hassle.
The dashboard is designed to be intuitive, so even if you’re new to website management, navigating it should feel comfortable.
Step#8. Explore Hostinger’s Support Resources
Hostinger offers a wealth of support resources to help you along the way. If you ever need assistance, you can:
- Access the Knowledge Base: Find articles, guides, and tutorials on nearly every topic related to website hosting and management.
- Use Live Chat Support: Hostinger’s support team is available 24/7 to answer your questions and resolve issues quickly.
Exploring these resources can be helpful, especially as you’re getting to know the platform.
Step#9. Install WordPress (or Choose Your CMS)
To create and manage your website’s content, you’ll need a Content Management System (CMS). WordPress is the most popular choice, and Hostinger makes it easy to install.
- In your Hostinger dashboard, locate Auto Installer under the Website section.
- Select WordPress from the options available.
- Enter your WordPress username, password, and website name.
- Click Install, and Hostinger will handle the setup process.
Hostinger’s one-click WordPress installation takes only a few minutes, and you’ll be ready to start building your website in no time. If you prefer a different CMS, Hostinger supports many other platforms, like Joomla or Drupal.
Step#10. Log into Your WordPress Dashboard
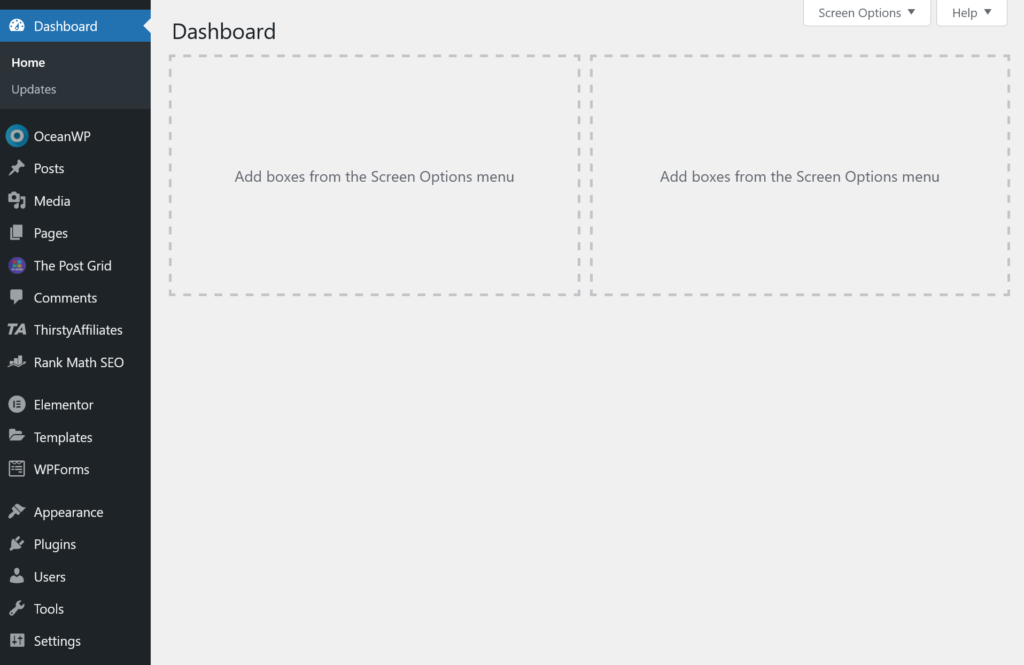
With WordPress installed, you’re ready to start customizing your site. Visit the login page for your dashboard, typically found at:
- yourwebsite.com/wp-admin
Enter your username and password (the ones you set during installation) to access the WordPress dashboard.
Once inside, you can begin:
- Adding new posts and pages: Create content for your blog or business.
- Installing plugins: Add new features like contact forms, SEO tools, or e-commerce capabilities.
- Choosing and customizing your theme: Go to Appearance > Themes to explore the themes you can activate and modify to fit your style.
Step#11. Choose a Theme and Customize Your Website
Now that WordPress is installed, it’s time to choose a theme to give your website a unique look.
- Go to Appearance > Themes.
- Browse WordPress’s vast collection of free and paid themes, or upload a custom theme if you have one.
- Once you find a theme you like, click Activate to apply it to your website.
Themes allow you to customize your site’s look and feel without needing to code. You can also use Hostinger’s Website Builder if you want a more intuitive drag-and-drop customization experience.
Step#12. Install Essential Plugins
From the left-hand menu, click on Plugins and then Add New. This will bring you to the WordPress Plugin Directory, where you can browse or search for plugins by name or feature.
In the search bar, enter the name of the plugin or a keyword related to the feature you need (like “SEO” or “security”). WordPress will show a list of plugins that match your search, and you can read reviews, check ratings, and view how many active installations each has.
Once you’ve found a plugin that looks useful, click Install Now. After installation, click Activate to enable the plugin on your website. You may need to configure settings or follow a quick setup process depending on the plugin.
Here are some of the most popular and essential plugins that can help you maximize your website’s potential.
1. Rank math
Rank Math is an all-in-one SEO plugin for WordPress that helps optimize your website for search engines. It offers features like keyword optimization, XML sitemaps, content analysis, rich snippets, and social media previews. Designed with a user-friendly interface, Rank Math makes it easy for beginners and experts to enhance their website’s visibility and performance.
How to Set Up Rank Math:
- Install and Activate Rank Math: Go to your WordPress dashboard, navigate to Plugins > Add New, and search for “Rank Math.”
- Click Install Now and then Activate once the installation is complete.
- Run the Setup Wizard: After activation, you’ll be prompted to run the Rank Math setup wizard. Click Start Wizard. Choose your website type (e.g., personal blog, eCommerce site).
- Connect Your Account (Optional): Sign up for a free Rank Math account and connect it to unlock additional features like advanced analytics.
- Set Basic SEO Settings: Configure general settings such as XML sitemaps, breadcrumbs, and no-follow links for external sources.
- Focus Keywords: Add your focus keywords for better content optimization guidance.
- Optimize Posts and Pages: Edit a post or page, and use the Rank Math metabox to analyze and optimize your content for SEO. Follow Rank Math’s suggestions to improve readability, keyword usage, and metadata.
- Test Rich Snippets: Enable and configure schema types (like Article, Product, or Recipe) to display rich snippets in search results.
2. Akismet Anti-Spam
Protecting your website from spam is crucial, especially if you have a blog or comment section. Akismet Anti-Spam automatically filters out spam comments and keeps your site clean and professional. Akismet is easy to set up and is free for personal sites.
How to Set Up Akismet:
- After activation, go to Settings > Akismet Anti-Spam.
- Connect your Akismet account and choose a plan (free for personal use).
- Akismet will now scan your comments for spam automatically.
3. Jetpack by WordPress.com
Jetpack is an all-in-one plugin that offers a range of features, from security and performance tools to analytics and social sharing. It’s ideal for beginners looking for a multifunctional plugin to manage site stats, backups, and more.
How to Set Up Jetpack:
- Activate Jetpack and connect it to your WordPress.com account.
- Choose the features you want to use, like stats, backups, or performance optimization.
- Customize settings under the Jetpack menu in your dashboard.
4. Wordfence Security
Security is essential for any website, and Wordfence Security offers protection against malware, hacks, and other online threats. Wordfence includes a firewall, malware scanner, and other security tools to help you monitor and protect your site.
How to Set Up Wordfence:
- After activation, go to Wordfence > Dashboard.
- Follow the setup wizard to configure firewall rules and scan settings.
- Regularly review the scan results to address any security concerns.
5. WP Super Cache
Site speed matters! WP Super Cache helps your website load faster by generating static HTML files. This reduces server load and can improve the user experience and SEO.
How to Set Up WP Super Cache:
- After activation, go to Settings > WP Super Cache.
- Enable caching, then select caching preferences.
- Run a few tests to make sure your site is loading quickly.
6. UpdraftPlus – Backup/Restore
Regular backups are essential to prevent data loss. UpdraftPlus is one of the best backup plugins, allowing you to back up your website to the cloud or download it locally. With UpdraftPlus, you can easily restore your site if needed.
How to Set Up UpdraftPlus:
- Go to Settings > UpdraftPlus Backups after activation.
- Set up automatic backups and choose where to store them (Google Drive, Dropbox, etc.).
- Run a manual backup to test the plugin.
7. Contact Form 7
For sites needing a simple way for visitors to get in touch, Contact Form 7 offers customizable forms that can be embedded anywhere on your site. It’s flexible, easy to set up, and compatible with spam protection plugins.
How to Set Up Contact Form 7:
- After activation, go to Contact > Add New.
- Customize your form, then copy the shortcode.
- Paste the shortcode onto any page or post to display the form.
Step#13. Add Essential Pages
Every website needs core pages to provide essential information and enhance user experience. These pages typically include:
- Home Page: A welcoming space for visitors.
- About Page: Share your story or business mission.
- Services/Products Page: Describe what you offer.
- Contact Page: Provide ways for visitors to reach you.
- Blog Page (optional): A space for articles and updates.
To add a new page in WordPress:
- Go to Pages > Add New.
- Enter a title and start adding your content.
- Use the Publish button to make it live.
Each page helps your audience navigate your website and understand what you have to offer.
Step#14. Optimize for SEO
SEO, or Search Engine Optimization, helps your website rank higher in search engines like Google. Hostinger provides tools and resources to help you optimize your website. Here’s where to start:
- Install an SEO Plugin: WordPress plugins like Rank Math provide simple ways to improve your SEO by guiding you on keywords, meta descriptions, and image alt text.
- Add Keywords: Choose relevant keywords related to your niche and incorporate them naturally throughout your content.
- Create High-Quality Content: Consistently post informative, engaging content to build a reputation as a valuable resource.
Proper SEO practices can help boost your website’s visibility and attract more visitors.
Step#15. Secure Your Website
Hostinger includes security features to keep your website safe, but here are a few additional steps to enhance security:
- Enable SSL Certificate: Hostinger offers a free SSL certificate with most hosting plans. Activate it to ensure your website is secure and displays the “https://” in the URL.
- Regular Backups: Set up regular backups using Hostinger’s backup options. This ensures you can recover your data if needed.
- Install Security Plugins: WordPress plugins like Wordfence or Sucuri Security add an extra layer of protection by monitoring and protecting against threats.
These steps can protect your website and give your visitors peace of mind.
Step#16. Launch Your Website
Congratulations! You’re almost ready to go live. Here’s a quick checklist before you hit the launch button:
- Preview Your Site: Take a final look to ensure everything is in place.
- Test on Multiple Devices: Ensure your website looks great on both mobile and desktop.
- Check All Links and Forms: Verify that links and forms work correctly.
When you’re ready, simply share your website link, start promoting your content, and welcome your visitors.
Final Thoughts
Creating a website with Hostinger is a smooth process that anyone can tackle. With powerful features, a user-friendly dashboard, and affordable plans, Hostinger makes it simple for anyone to launch a professional-looking website. Whether you’re starting a blog, building an online portfolio, or launching an e-commerce store, Hostinger provides all the tools you need to create a website that stands out.
So, are you ready to bring your ideas to life online? Sign up with Hostinger today, follow these steps, and watch your website take shape!


