Have you ever dreamed of making something amazing that people all over the world can use? How to Create Digital Products is your guide!
Many people want to share their knowledge or skills online, but it can feel a bit confusing to start.
The good news is, the world of digital products is huge and growing fast! In fact, people spent about $560 billion on digital products in 2024 alone.
This blog post will show you, step-by-step, how to turn your ideas into awesome digital products like e-books, online courses, or templates.
We’ll cover everything from finding your best idea to launching it successfully. Get ready to create something wonderful!
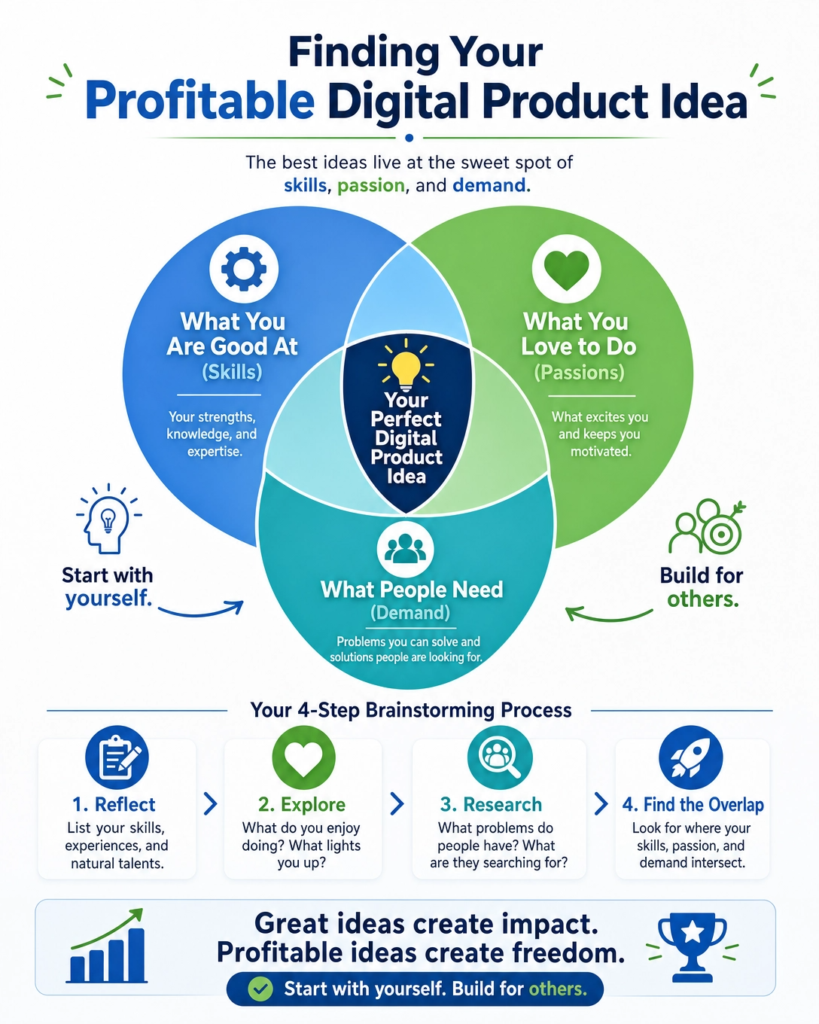
Step 1: Brainstorm Your Skills and Passions
Creating digital products can feel like a big task. But it all starts with you. The very first step is to look inside yourself.
Think about what you are good at.
What do you love to do?
What problems do you enjoy solving for others?
These are your skills and passions. They are the goldmine for your digital product ideas.
Many people think they need a brand-new, never-before-seen idea. This is not true. Your unique experiences and knowledge are valuable.
For example, if you love baking, you could create an e-cookbook. If you are great at organizing, you might make a digital planner.
If you know a lot about social media, you could offer a guide on how to grow an online following.
The possibilities are endless when you start with what you already know and enjoy.
Think about your hobbies.
What do you do in your free time?
Do you knit, paint, play an instrument, or garden?
Can you teach someone else to do it?
Even if you think your skill is common, remember that not everyone has it.
Your way of explaining things, your tips, and your tricks are what make your product special. Don’s be afraid to share your unique perspective.
Also, consider what people often ask you for help with. Are you the go-to person for tech advice? Do friends ask you to review their resumes? These are clear signs of where your expertise lies.
People are already seeing you as an expert in these areas. This means there’s a demand for your knowledge. Turning this help into a digital product can be very rewarding.
This brainstorming phase is not about perfection. It’s about getting all your ideas out.
Write down everything that comes to mind. Don’t judge your ideas yet. Just list them. You can refine them later.
The more ideas you have, the more options you’ll have to choose from.
This step builds the foundation for a digital product that you will enjoy creating and selling, because it comes from a place of genuine interest and skill.
Step 2: Research Your Target Audience
Understanding your audience is super important. Think of it like this: you wouldn’t try to sell a toy car to someone who needs a real car, right? It’s the same with digital products.
You need to know who you are making it for. This is called your target audience.
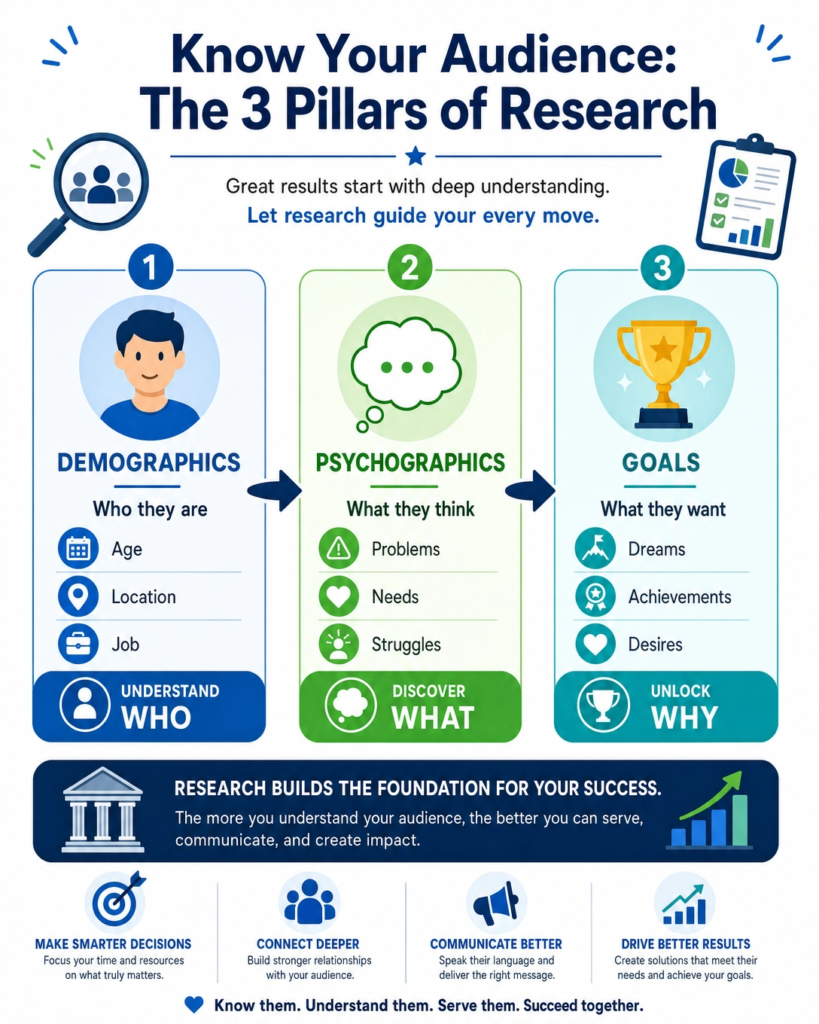
First, let’s figure out who they are.
Are they young students, busy parents, or small business owners?
What are their ages?
Where do they live?
What do they do for work? Knowing these basic things helps a lot.
For example, if you’re making a digital product for busy parents, it needs to be quick and easy to use. If it’s for students, it might need to be affordable.
Next, think about their problems and needs. What struggles do they have that your digital product can solve? Maybe they are stressed about managing their time.
Or they want to learn a new skill but don’t know where to start. Listen to what people are saying.
Look at online forums, social media groups, or even talk to people you know.
What questions do they ask?
What solutions are they looking for?
Your digital product should be a helpful answer to one of these problems.
Also, consider their desires and goals.
What do they dream of achieving?
Do they want to earn more money, get healthier, or learn a new hobby?
Your digital product can help them reach these goals.
For instance, if your audience wants to learn photography, your digital product could be an e-book with easy tips or a video course on editing photos.
How to find this information?
You can do simple research. Look at what other people are selling in your area of interest. Read reviews.
What do customers like or dislike?
What are they asking for that isn’t available yet?
You can also use online tools to see what people are searching for.
Websites like Google Trends can show you popular topics. Surveys are another great way to ask people directly what they need. Just a few questions can give you big insights.
By understanding your target audience deeply, you can create a digital product that they truly want and need. This makes it much easier to sell and helps you build a loyal following.
It’s all about making something valuable for the right people. Don’t guess; find out!
This step saves you time and effort later on because you’ll be building something that already has a demand.
It’s like having a map before you start a journey; it shows you exactly where to go to find your treasure.
Step 3: Choose the Right Format for Your Digital Product
Now that you know your skills and who you want to help, it’s time to pick the best way to deliver your digital product.
Think of it like choosing the right container for your amazing idea.
There are many different types of digital products, and the best one depends on what you’re teaching or offering, and what your audience prefers.
Let’s look at some popular digital product formats:
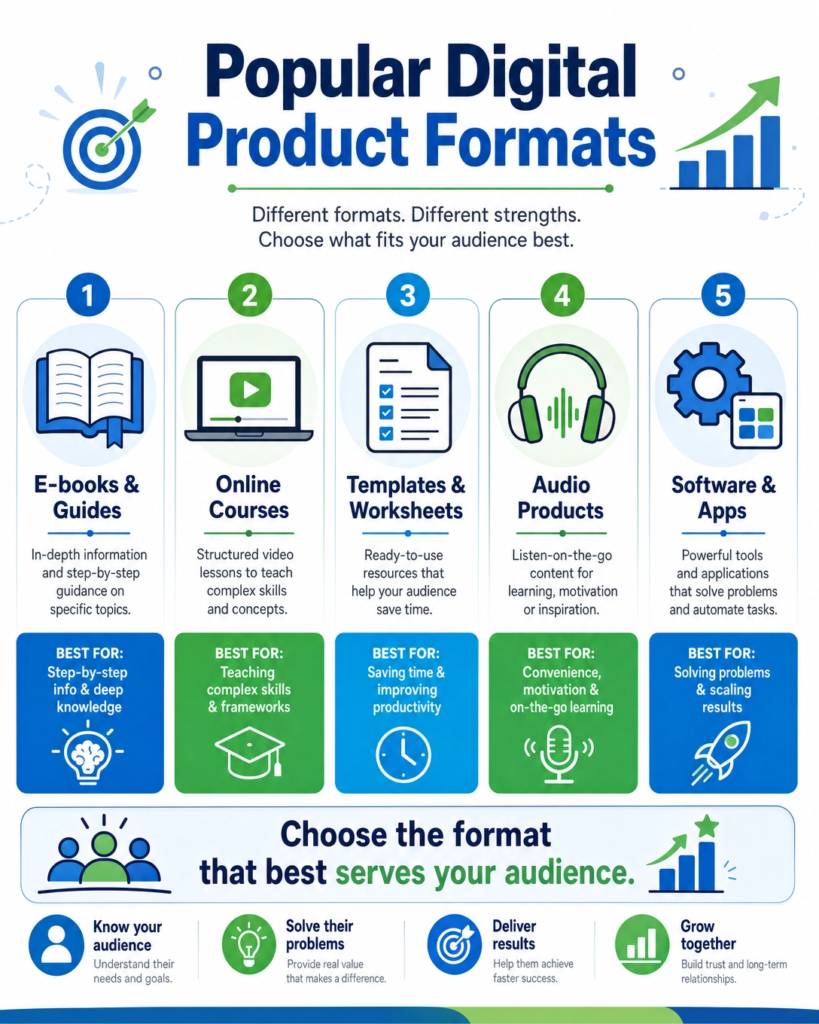
E-books and Guides: These are like digital books. They are great for sharing information, step-by-step instructions, or detailed knowledge.
People can read them on their computers, tablets, or phones. They are easy to create if you love writing and explaining things.
For example, a guide on “How to Start a Small Garden” or an e-book on “Beginner’s Guide to Social Media.”
Online Courses: These are structured lessons, often with videos, text, quizzes, and assignments.
They are perfect for teaching complex skills or subjects that need more interaction. If you like teaching and can break down big topics into smaller parts, a course might be for you.
Examples include a course on “Learning Basic Photography” or “Mastering Digital Art.”
Templates and Worksheets: These are pre-designed documents that people can fill in or customize.
They save your audience time and effort. If you’re good at design or organizing information, templates can be very useful.
Think of a budget planner template, a social media content calendar, or a resume template.
Audio Products (Podcasts, Meditations): If you have a great speaking voice or want to share content that people can listen to on the go, audio products are a good choice.
This could be a series of guided meditations, a podcast about business tips, or audio lessons. They are convenient for busy people.
Software and Apps: These are more advanced, but if you have coding skills or a unique idea for a tool, a small app or software can be a powerful digital product.
This could be a simple calculator for finances or a tool to help organize tasks.
Which one is right for you? Consider your audience again. Do they prefer reading, watching, listening, or doing? Also, think about your content.
Is it best explained visually, through text, or interactively? Don’t try to do everything at once.
Start with one format that feels natural to you and best suits your idea. You can always create other formats later.
Choosing wisely now will make the creation process much smoother and ensure your product truly helps your audience.
Step 4: Validate Your Digital Product Idea
After you’ve brainstormed your idea and picked a format, the next big step is to make sure people actually want what you’re offering.
This is called validation. It means checking if your idea solves a real problem for your audience.
You don’t want to spend a lot of time creating something nobody will buy, right? That would be a waste of your precious time and effort.
Validation helps you avoid guessing. It gives you confidence that your digital product will be successful.
It also helps you understand your audience even better. You might discover new needs or ways to improve your idea.
Think of it as asking for directions before you start a long trip. You want to know you’re going the right way.
There are simple ways to validate your idea. You don’t need to build the whole product first.
Here are a few easy methods:
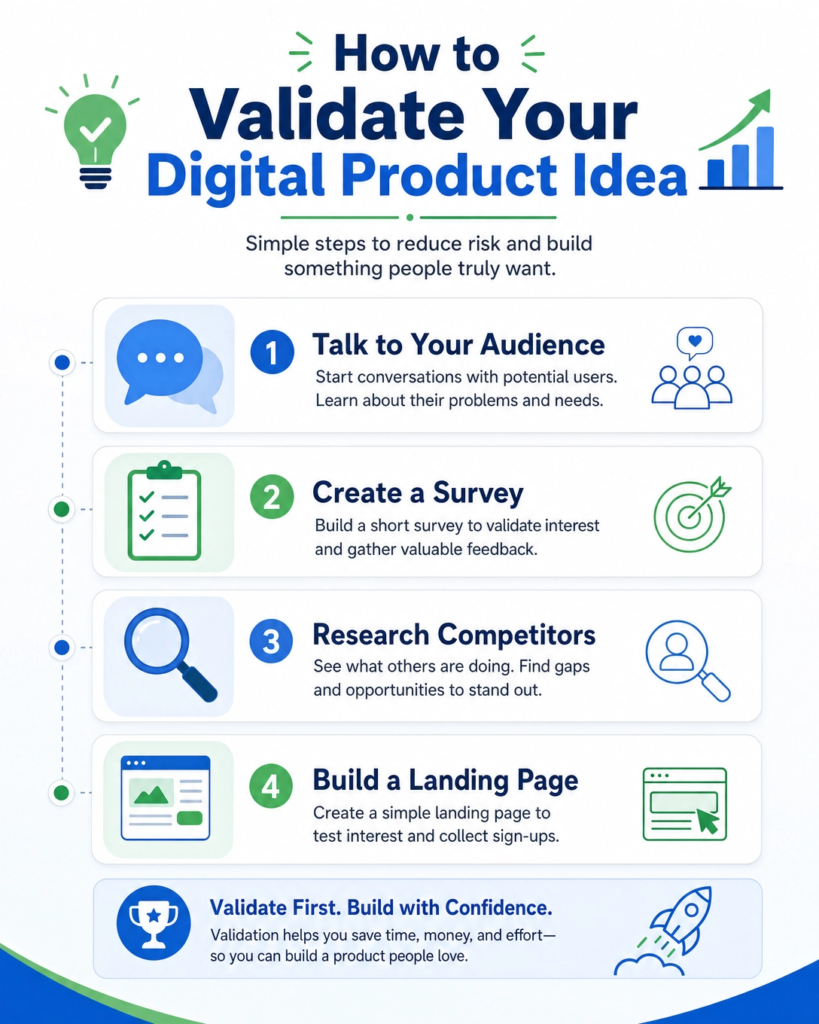
Talk to Your Audience: This is the most direct way. Reach out to people who fit your ideal audience profile.
Ask them about their problems related to your idea. For example, if your product is a budget planner, ask them about their struggles with managing money.
Listen carefully to their answers. Do they seem excited about a solution?
Surveys and Polls: Use simple online tools to create short surveys. Ask questions about their challenges and if they would be interested in a product like yours.
You can share these surveys on social media or in relevant online groups. Keep the questions clear and easy to answer.
Look at What’s Already Out There: Are there similar products? This isn’t a bad thing! It shows there’s a market. See what those products do well and what they miss.
How can your product be different or better? This is called market research. It helps you find your unique spot.
Create a Landing Page: A landing page is a simple webpage that describes your product idea.
You can collect email addresses from people who are interested. This shows real demand. If many people sign up, you know you’re onto something good.
You don’t need the product ready yet, just the idea.
Validation is about getting feedback early. It helps you make smart choices. It guides you to create a digital product that truly helps people and that they are happy to pay for.
Don’t skip this step! It’s a small effort now that can save you huge headaches later. It’s like planting a seed and making sure the soil is good before you expect a big harvest.
Your digital product journey will be much smoother with a validated idea.
Step 5: Outline Your Content
Now that you have a validated idea and know your product format, it’s time to plan out what actually goes inside your digital product.
This is called outlining your content. Think of it like drawing a map before you start building a house.
A good outline makes sure you don’t miss anything important and that your product flows well from start to finish.
Outlining helps you organize your thoughts. It breaks down a big project into smaller, manageable parts. This makes the creation process less overwhelming.
It also ensures that your content is logical and easy for your audience to follow. A clear structure helps your users learn or use your product effectively.
It’s like having a table of contents for a book, even if your product isn’t a book.
The way you outline depends on your product format.
Here are some general tips and examples:
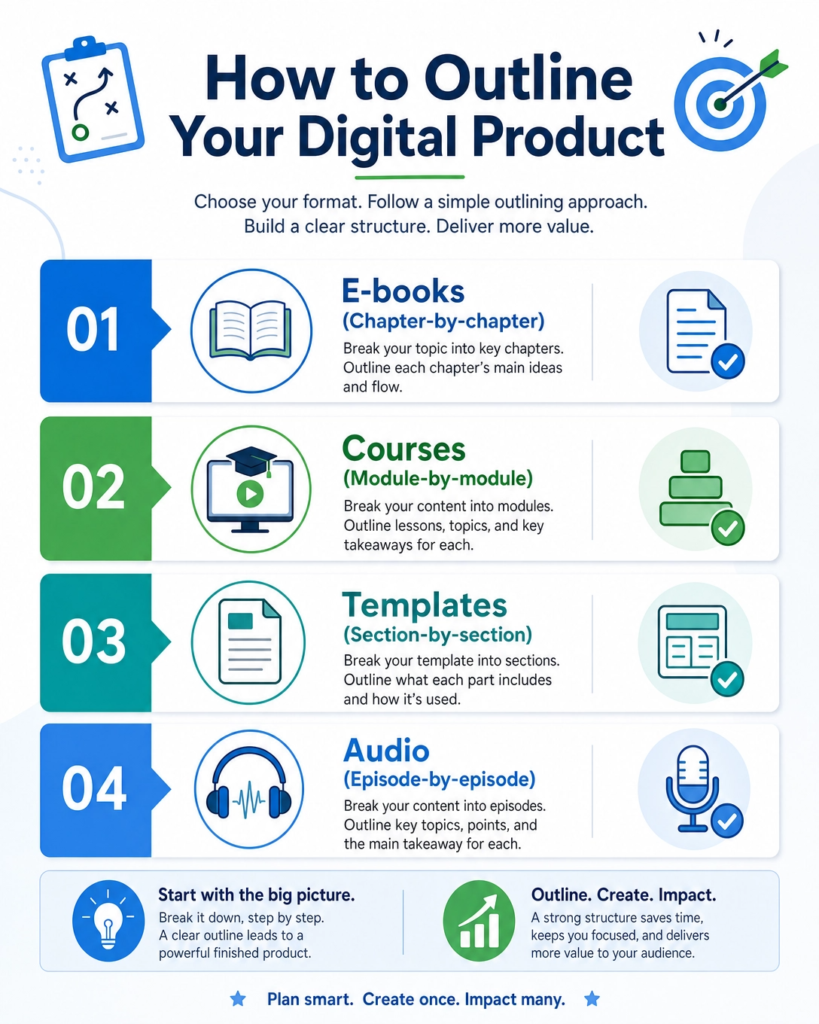
For E-books or Guides: Think about chapters or main sections. Each chapter should cover one main idea. Break down each chapter into smaller topics or sub-sections.
Use bullet points to list key information you want to include in each part.
For example, if your e-book is about “Healthy Breakfasts,” you might have chapters like “Why Breakfast Matters,” “Quick & Easy Recipes,” and “Meal Prep Tips.”
For Online Courses: Courses usually have modules or lessons. Each module focuses on a specific skill or topic.
Within each module, you’ll have individual lessons. Decide what you’ll teach in each lesson, what activities they’ll do, and what resources they’ll need.
For example, a photography course might have a module on “Understanding Your Camera,” with lessons on “Aperture,” “Shutter Speed,” and “ISO.”
For Templates or Worksheets: Even templates need an outline! Think about the purpose of your template.
What information does it need to collect?
What steps does it guide someone through? List all the sections, fields, or prompts you need to include.
For example, a budget planner template would need sections for “Income,” “Fixed Expenses,” “Variable Expenses,” and “Savings Goals.”
For Audio Products: Plan your episodes or segments. What’s the main topic of each? What points will you cover? Will there be an introduction, main content, and a call to action?
For a meditation series, you might outline different types of meditations, like “Morning Focus” or “Evening Relaxation.”
Start with the big picture, then zoom in on the details. Don’t worry about writing perfect sentences yet.
Just get all your ideas down. This outline will be your roadmap. It will guide you as you create your amazing digital product.
It ensures you deliver all the value you promised to your audience.
Step 6: Create Your Content
Now comes the exciting part: bringing your digital product to life! This is where you actually create your content. You’ve done all the planning, outlining, and validating.
Now it’s time to roll up your sleeves and make it real. Don’t worry if it feels like a big task. Just take it one step at a time, following your outline.
Tips for Creating Great Content:
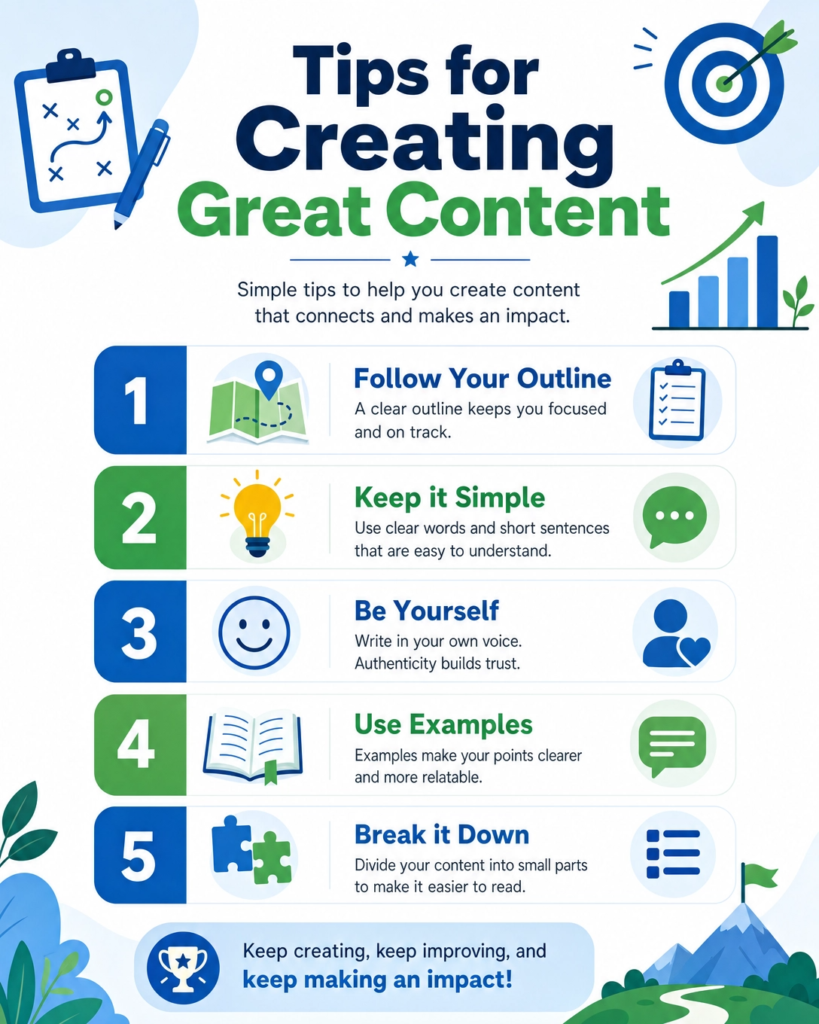
Follow Your Outline: Your outline is your guide. Stick to it to make sure your content is organized and covers everything you planned. This helps you stay focused and prevents you from getting lost.
Keep it Simple and Clear: Remember your audience. Use easy-to-understand language. Avoid jargon or complex words. Explain things clearly, as if you’re talking to a friend. Short sentences are often best.
Be Yourself: Your unique voice is what makes your product special. Don’t try to sound like someone else. Let your personality shine through. This helps you connect with your audience on a deeper level.
Use Examples and Stories: People learn best from examples. Share real-life stories or scenarios to make your points clearer. This makes your content more engaging and memorable.
Break it Down: If you’re creating a long e-book or a big course, break your work into smaller chunks. Focus on completing one chapter, one lesson, or one section at a time. This makes the process feel less overwhelming and helps you see progress.
Use Visuals: Images, charts, and diagrams can make your content much more interesting and easier to understand. If you’re making videos, think about good lighting and clear audio. Visuals help explain complex ideas quickly.
Edit and Proofread: Once you’ve created your content, take time to review it. Check for any mistakes in spelling or grammar. Make sure your message is clear and easy to follow. You can even ask a friend to read it over for you. A polished product looks professional.
Creating your content is a journey. There will be days when it feels easy and days when it feels hard. Just keep going!
Every word you write, every video you record, every template you design brings you closer to helping your audience.
Remember why you started. You have valuable knowledge to share, and your digital product is the way to do it. Enjoy the process of creation!
Step 7: Design and Package Your Product
You’ve created amazing content. Now, it’s time to make it look professional and appealing.
This step is all about designing and packaging your product. Think of it like wrapping a gift.
The content inside is valuable, but a beautiful package makes people excited to open it. Good design makes your product trustworthy and easy to use.
First impressions are very important. When someone sees your digital product, its design is the first thing they notice.
A clean, attractive design shows that you care about quality. It makes your product look professional and valuable.
Good packaging also makes your product easy to understand and navigate. It helps users find what they need quickly.
This improves their experience and makes them more likely to recommend your product.
Key Elements of Design and Packaging:
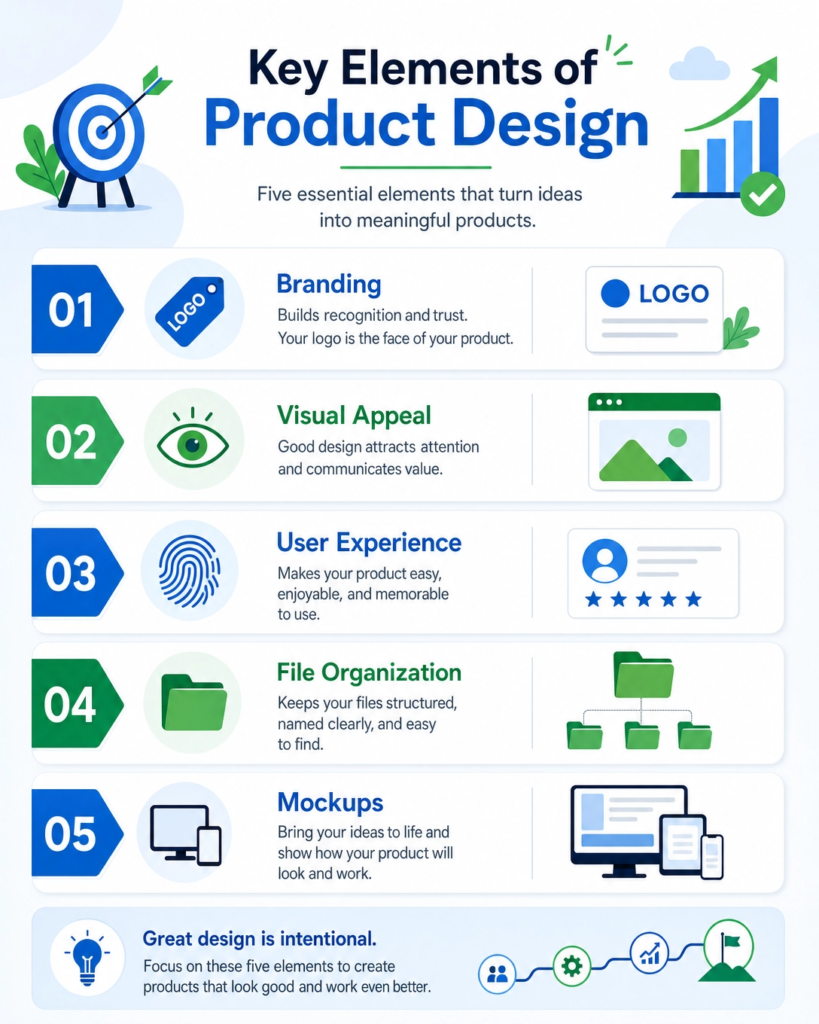
Branding: This is your product’s unique identity. Choose consistent colors, fonts, and a logo.
This helps people recognize your product instantly. Your brand should reflect your product’s personality and message.
Visual Appeal: Use high-quality images, graphics, and layouts. For e-books, this means a professional cover and easy-to-read formatting.
For courses, it means clear video quality, well-designed slides, and an intuitive platform. For templates, ensure they are clean, functional, and visually pleasing.
User Experience (UX): This is about how easy and enjoyable your product is to use. Is it simple to download? Can users find information quickly? Is the navigation clear? A good user experience keeps people engaged and happy.
File Organization: Make sure your product files are well-organized. Use clear folder names and file names.
Provide instructions on how to access and use your product. This prevents confusion and frustration for your customers.
Mockups and Previews: Before you launch, create attractive mockups of your product. These are visual representations of what your product looks like.
For example, a picture of your e-book cover on a tablet, or a screenshot of your course dashboard.
These previews help potential customers imagine using your product. They make your product feel more tangible and desirable.
Designing and packaging your product is the final touch. It transforms your raw content into a polished, ready-to-sell item.
Invest time in this step. It will pay off by attracting more customers and making them happy.
A well-designed product stands out in the market and builds trust with your audience. Make it shine!
Step 8: Price Your Digital Product
Deciding how much to charge for your digital product can feel tricky. This step is all about pricing your digital product effectively.
You want to find a price that feels fair to your customers and also values your hard work.
The right price can attract buyers and help your business grow. The wrong price can make people hesitate.
Factors to Consider When Pricing:
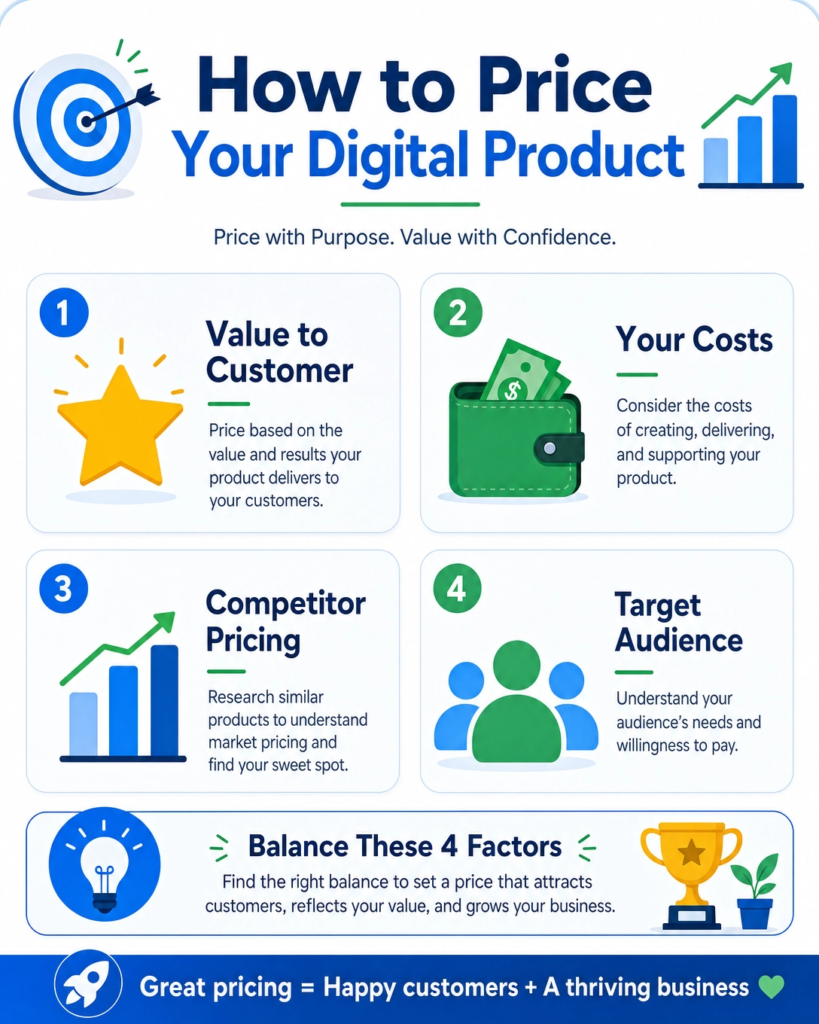
Value to the Customer: How much benefit does your product offer? Does it save them time, money, or solve a big problem?
The more value it provides, the more you can charge. Think about the transformation your product offers.
Your Costs: Even though digital products don’t have physical costs, you still invested time, effort, and possibly money in tools or software. Consider these costs when setting your price. Your time is valuable!
Competitor Pricing: Look at what similar products are selling for. This gives you a benchmark.
You don’t have to match their prices exactly, but it helps you understand the market. What makes your product different or better?
Your Target Audience: Who are you selling to? Are they beginners looking for an affordable solution, or professionals willing to invest more for high-quality tools? Understand their budget and willingness to pay.
Common Pricing Strategies:
Value-Based Pricing: Set your price based on the perceived value your product offers to the customer. If your product helps someone earn an extra $1000, charging $97 might be a great deal for them.
Cost-Plus Pricing: Calculate all your costs (time, tools, etc.) and then add a profit margin. This is simpler but might not always reflect the true value.
Competitive Pricing: Price your product similar to or slightly above/below your competitors. This is useful if your product is similar to others on the market.
Tiered Pricing: Offer different versions of your product at different price points. For example, a basic version, a standard version with more features, and a premium version with everything. This allows you to cater to different customer needs and budgets.
Many new creators make the mistake of underpricing their products. They think a low price will attract more buyers.
But a very low price can sometimes make your product seem less valuable. People often associate higher prices with higher quality.
Be confident in the value you provide. It’s better to start a bit higher and offer discounts later than to start too low and try to raise prices.
Test different price points if you can. Get feedback from your audience.
The goal is to find that sweet spot where your customers feel they are getting a great deal, and you feel fairly compensated for your expertise and effort.
Pricing is a skill that improves with practice and market understanding. You’ve worked hard to create something valuable. Make sure your price reflects that!
Step 9: Launch Your Digital Product
You’ve worked hard! You’ve had a great idea, created amazing content, and packaged it beautifully.
Now it’s time for the big moment: launching your digital product. This is when you make your product available to the world.
A successful launch can bring in your first customers and start your digital product journey.
Before you hit the launch button, make sure everything is ready. This preparation helps ensure a smooth and exciting debut.
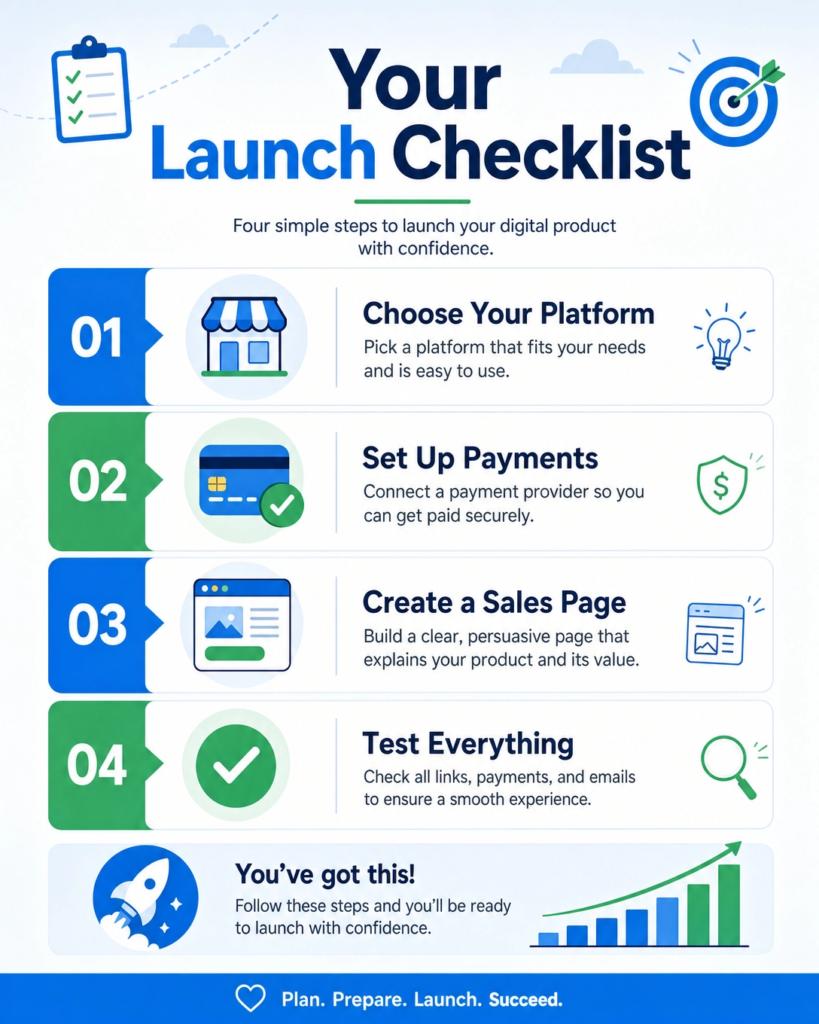
Choose Your Platform: Where will you sell your product? Popular options include your own website (using platforms like WordPress with WooCommerce), dedicated marketplaces (like Etsy for templates, Udemy for courses), or specialized platforms (like Gumroad or Teachable). Pick a platform that fits your product and your audience.
Set Up Payment Processing: You need a way to accept payments. Most platforms have built-in payment options. If you’re selling from your own site, you might use services like Stripe or PayPal. Make sure it’s secure and easy for customers to use.
Create a Sales Page: This is a special page that tells people all about your product. It should explain what your product is, who it’s for, what problems it solves, and what benefits it offers. Use clear, exciting language and include your beautiful product mockups. A strong call to action (like “Buy Now” or “Enroll Today”) is essential.
Test Everything: Before launch, pretend you are a customer. Go through the entire buying process. Can you easily find the product? Does the payment work? Do you receive the product files correctly? Test all links and downloads. This helps catch any issues before your real customers do.
Once everything is set up, it’s time to tell people about your new product. This is where marketing comes in.
Social Media: Share your launch news on platforms where your audience hangs out. Use engaging posts, stories, and videos. Show off your product and its benefits.
Email List: If you have an email list, this is your most powerful tool. Send out an announcement to your subscribers. Offer them a special launch discount or bonus. They are already interested in what you do.
Collaborate: Work with other creators or influencers in your niche. They can help spread the word to their audience. This can be a great way to reach new people.
Content Marketing: Write blog posts, create videos, or do podcasts that relate to your product. This helps attract people who are looking for solutions your product offers.
Launching your digital product is a huge milestone. It’s the reward for all your hard work. Don’t expect perfection, but aim for a smooth experience.
Celebrate your launch, learn from your first sales, and get ready to help many people with your valuable creation!
Conclusion
Congratulations! You’ve just walked through the complete journey of creating your own digital product.
From finding your perfect idea to launching it to the world, each step is a building block towards your success.
Let’s quickly recap the path we’ve covered:
Find Your Niche and Idea: Discover what you love and what problems you can solve for others.
Research Your Audience: Understand who you’re helping and what they truly need.
Choose the Right Format: Pick the best way to deliver your knowledge, whether it’s an e-book, course, or template.
Validate Your Idea: Make sure people actually want what you’re creating before you invest too much time.
Outline Your Content: Plan out your product’s structure to ensure it’s clear and easy to follow.
Create Your Content: Bring your ideas to life with engaging and valuable material.
Design and Package Your Product: Make your product look professional and appealing.
Price Your Digital Product: Set a price that reflects your value and attracts your ideal customers.
Launch Your Digital Product: Share your creation with the world and start making an impact.
Each step is important, but remember, the most crucial part is to start. Don’t wait for perfection.
Take action, learn along the way, and improve with each new product you create.
Your unique skills and knowledge are valuable, and there’s an audience out there waiting for what you have to offer.
Are you ready to turn your passion into profit? The world of digital products is open to everyone, and your journey begins now.
Don’t let fear or uncertainty hold you back. Take that first step, choose an idea, and begin building. Imagine the freedom and impact you could create by sharing your expertise.
What’s your first step going to be?
Brainstorm ideas: Grab a notebook and list every digital product idea that comes to mind.
Talk to your audience: Ask friends, family, or social media followers what problems they need solved.
Pick one idea: Don’t get stuck in analysis paralysis. Choose one idea and commit to exploring it further.
The digital world is waiting for your unique contribution. Start creating, start sharing, and start earning. Your future self will thank you!